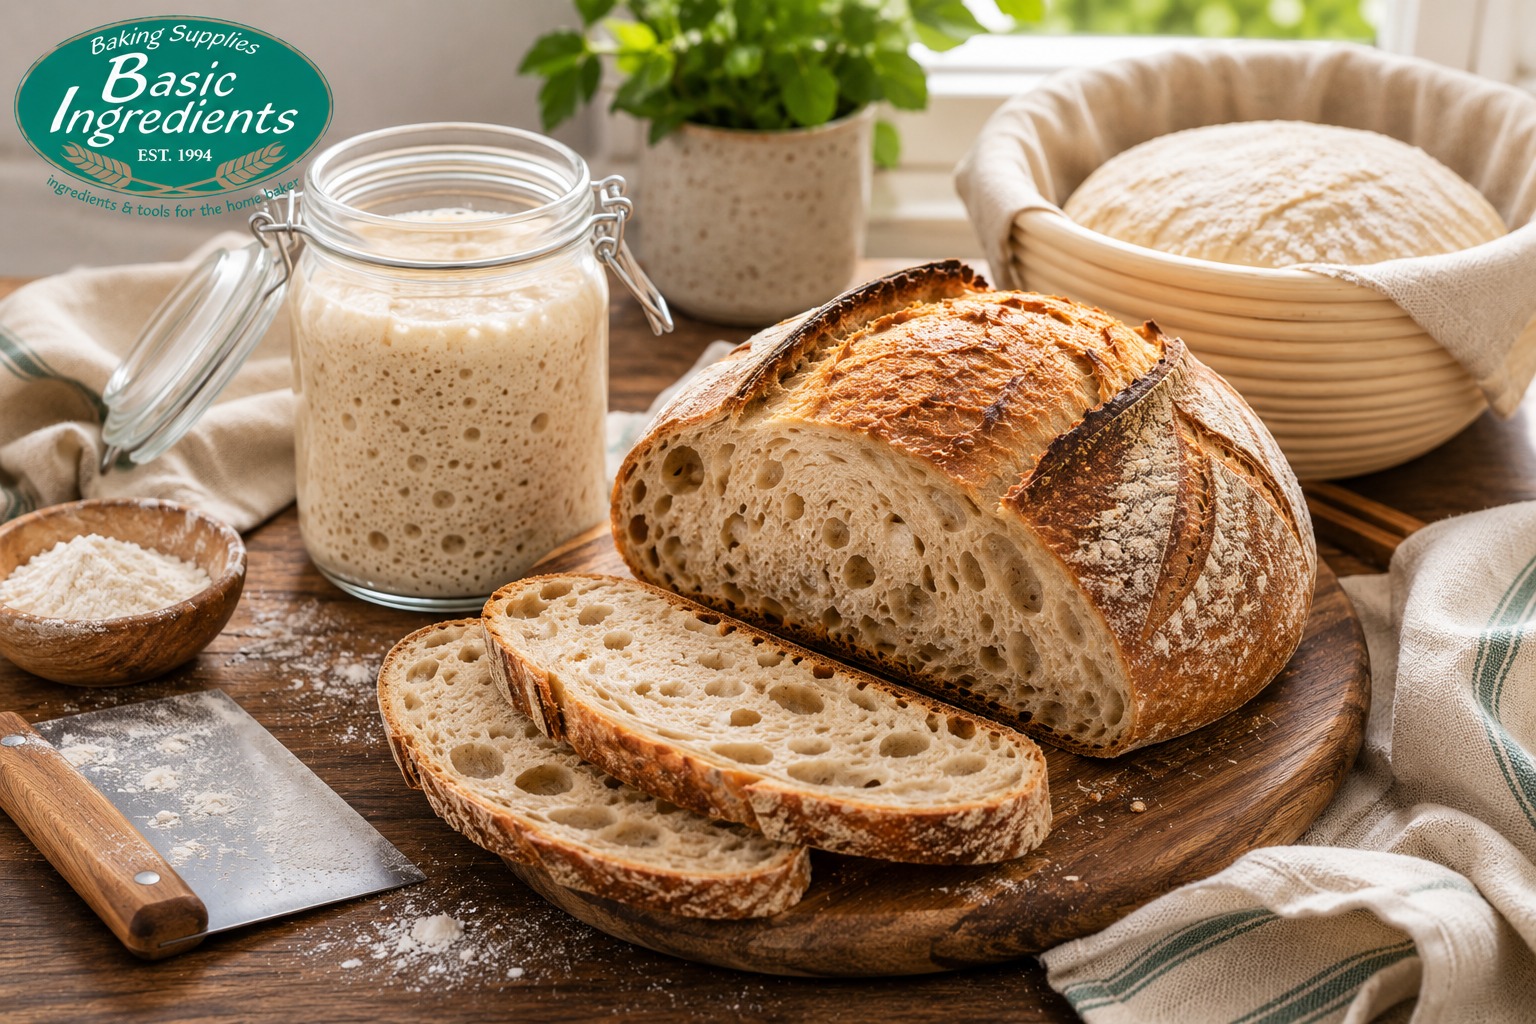
Sourdough bread has never been more popular in Australian home kitchens. And once you understand how it works, it is genuinely one of the most rewarding things you can bake.
But if you are starting from scratch, it can feel overwhelming. Starters, hydration, bulk fermentation, scoring — the terminology alone is enough to put people off. This guide cuts through the noise and gives you a clear, practical path from zero to your first loaf.
No fluff. Just what you actually need to know.
What Makes Sourdough Different from Regular Bread
Most bread uses commercial yeast — a reliable, fast-acting ingredient that makes dough rise in a couple of hours. Sourdough uses a live fermented culture called a starter instead.
A starter is a mixture of flour and water that naturally captures wild yeast and bacteria from the environment. Over time it becomes active and bubbly. When you add it to dough, it makes the bread rise and gives sourdough its signature tangy flavour and chewy texture.
The process is slower than commercial yeast baking. A sourdough loaf typically takes 24 to 48 hours from start to finish. But most of that time is hands-off waiting, not active work.
What You Need Before You Start
Ingredients
- Bread flour or strong flour (higher protein content gives better structure)
- Wholemeal or rye flour for feeding your starter
- Water — filtered or left to sit overnight if your tap water is heavily chlorinated
- Salt
Equipment
- A digital kitchen scale (volume measures are not accurate enough for sourdough)
- A large mixing bowl
- A banneton proofing basket or a bowl lined with a floured cloth
- A Dutch oven or heavy lidded pot
- A bread lame or sharp knife for scoring
You do not need expensive equipment to start. A basic Dutch oven and a kitchen scale will get you through your first several loaves.
Step 1: Make Your Sourdough Starter
Your starter is the foundation of every loaf. Getting it right takes about 7 days, but the daily process takes less than five minutes.
Day 1
Mix 50g of wholemeal or rye flour with 50g of room temperature water in a clean jar. Stir well, cover loosely, and leave at room temperature.
Days 2 to 4
You may see some small bubbles beginning to form. Each day, discard half the starter and feed it with 50g of flour and 50g of water. Stir well and cover loosely.
Days 5 to 7
The starter should become more active. You will notice it rising and falling between feedings, developing a slightly sour smell. When it reliably doubles in size within 4 to 8 hours of feeding and looks bubbly throughout, it is ready to use.
In Australian climates, warmer kitchens speed up fermentation. If your kitchen is above 25°C, your starter may be ready faster. In cooler southern states during winter, it may take a day or two longer.
Step 2: Mix Your Dough
Once your starter is active, you are ready to mix your first dough.
Basic beginner sourdough recipe (makes one loaf):
- 450g bread flour
- 50g wholemeal flour
- 375g water (room temperature)
- 100g active starter
- 10g salt
Combine the flours and 350g of the water in a large bowl. Mix until no dry flour remains. Cover and rest for 30 minutes — this is called autolyse and it helps the gluten develop more easily.
After the rest, add the starter and salt, along with the remaining 25g of water. Squeeze and fold the dough until everything is fully incorporated. It will feel sticky and rough at first. That is normal.
Step 3: Bulk Fermentation
Cover the bowl and leave the dough to ferment at room temperature for 4 to 6 hours. During the first 2 hours, perform a set of stretch and folds every 30 minutes — four sets in total.
To stretch and fold: wet your hand, grab one side of the dough, stretch it up, and fold it over to the other side. Rotate the bowl 90 degrees and repeat four times per set.
After the stretch and folds, leave the dough undisturbed for the remainder of the bulk fermentation. The dough is ready when it has grown by around 50 to 75 percent and looks airy and slightly domed.
In a warm Australian kitchen in summer, bulk fermentation may take only 3 to 4 hours. In winter, it may take 6 to 8 hours. Watch the dough, not the clock.
Step 4: Shape Your Loaf
Tip the dough onto an unfloured surface. Using a bench scraper and your hand, shape it into a tight round ball by pulling it toward you and rotating it. The surface tension you build here helps the loaf hold its shape in the oven.
Dust your banneton generously with rice flour or a mix of rice flour and plain flour. Rice flour prevents sticking far better than wheat flour. Place the shaped loaf seam-side up into the banneton.
Step 5: Cold Proof Overnight
Cover the banneton with a shower cap or plastic bag and place it in the fridge for 8 to 16 hours. This cold proof slows fermentation and develops flavour. It also firms the dough, which makes it easier to score before baking.
You can bake straight from the fridge — no need to bring it to room temperature first.
Step 6: Bake Your Sourdough
Place your Dutch oven in the oven and preheat to 250°C for at least 45 minutes. The pot needs to be very hot before the dough goes in.
Tip the cold dough from the banneton onto a piece of baking paper. Score the top with a bread lame or sharp knife at a 30 to 45 degree angle — a single curved cut along the side works well for beginners. This controls where the loaf expands in the oven.
Carefully lower the dough into the hot Dutch oven using the baking paper. Put the lid on.
Bake with lid on at 250°C for 20 minutes. This traps steam, which keeps the crust soft long enough for the loaf to expand fully.
Remove the lid and bake for a further 20 to 25 minutes until the crust is deep golden brown. Do not be afraid of colour — an under-baked sourdough has a gummy interior.
Remove the loaf and cool on a wire rack for at least one hour before cutting. Cutting too early collapses the crumb structure.
Common Beginner Mistakes to Avoid
Using the starter too early. If your starter is not consistently doubling between feedings, the dough will not rise properly. Patience here saves a lot of failed loaves.
Over-fermenting in warm weather. Australian summers can push bulk fermentation faster than expected. If your dough feels very slack, sticky, and almost liquid, it has over-fermented. Start checking earlier next time.
Cutting the loaf too soon. The inside of the loaf is still cooking as it cools. Cutting within the first hour produces a doughy, gummy crumb even if the outside looks perfect.
Using too much flour when shaping. A lightly sticky surface helps the dough grip the bench and build tension. Too much flour and the dough slides instead of gripping.
Choosing the Right Flour for Sourdough in Australia
Flour makes a significant difference in sourdough. Higher protein bread flour gives the gluten network more strength, which means better structure and a more open crumb.
Standard supermarket plain flour can work in a pinch, but bread flour consistently produces better results. Adding a small percentage of wholemeal or rye flour feeds the starter and adds flavour complexity to the finished loaf.
For Australian bakers wanting to go further, Basic Ingredients carries a range of bread flours and sourdough cultures suited to home baking, including options that help you get your starter established faster.
Frequently Asked Questions
How long does sourdough bread take to make?
From an active starter to a finished loaf, plan for 24 to 36 hours. Most of that time is fermentation and proofing, not hands-on work. Active preparation takes roughly 30 to 45 minutes across the whole process.
Why is my sourdough bread too dense?
The most common reasons are an under-active starter, under-fermented dough, or not enough steam during baking. Make sure your starter reliably doubles before using it, and always bake with a lid on for the first 20 minutes.
Can I make sourdough without a Dutch oven?
A Dutch oven creates the steam environment that gives sourdough its crust and oven spring. Without one, you can try placing a tray of boiling water on the oven floor while the bread bakes, but results are less consistent.
What flour is best for sourdough in Australia?
Strong bread flour with a protein content above 11 percent gives the best structure. Adding 10 to 20 percent wholemeal or rye flour improves flavour and gives the wild yeast more to feed on.
How do I know when my sourdough is properly proofed?
Poke the cold dough with a floured finger. If it springs back slowly and leaves a slight indentation, it is ready. If it springs back immediately, it needs more time. If it does not spring back at all, it may be over-proofed.
How should I store sourdough bread?
Keep sourdough at room temperature wrapped in a cloth or beeswax wrap for up to 3 days. For longer storage, slice and freeze it. Avoid plastic bags — they trap moisture and soften the crust.