Buying a brand-new lace front wig is always exciting, but taking it straight out of the box and slapping it onto your head rarely gives you that flawless, red-carpet look. If you want your install to look like it is growing directly from your scalp, you need to customize it. Two of the most critical steps in this customization process are bleaching the knots and plucking the hairline.
When manufacturing lace front wigs, hair strands are hand-tied to a delicate lace base, creating tiny, visible dark knots where the hair meets the lace. Combined with a dense, unnaturally straight hairline, these factors are a dead giveaway that you are wearing a unit.
Fortunately, you do not need to spend hundreds of dollars at a professional salon to fix this. In this comprehensive, step-by-step guide, we will break down exactly how to bleach knots and pluck your wig lace front at home like an absolute pro.
Understanding the Basics: What is a Frontal Wig?
Before diving into the physical customisation process, it helps to understand the anatomy of your unit. A common question among beginners is: what is a frontal wig?
Essentially, a lace frontal wig features a piece of lace that extends from ear to ear, typically measuring 13 inches across and 4 or 6 inches back. This structural design offers incredible parting versatility across the entire front of your head. Because the lace mimics a natural hairline, lace front wigs have become the industry standard for protective styling. However, because the hair is hand-tied, those pesky knots must be chemically lightened, and the dense hairline must be thinned out to achieve true transparency.
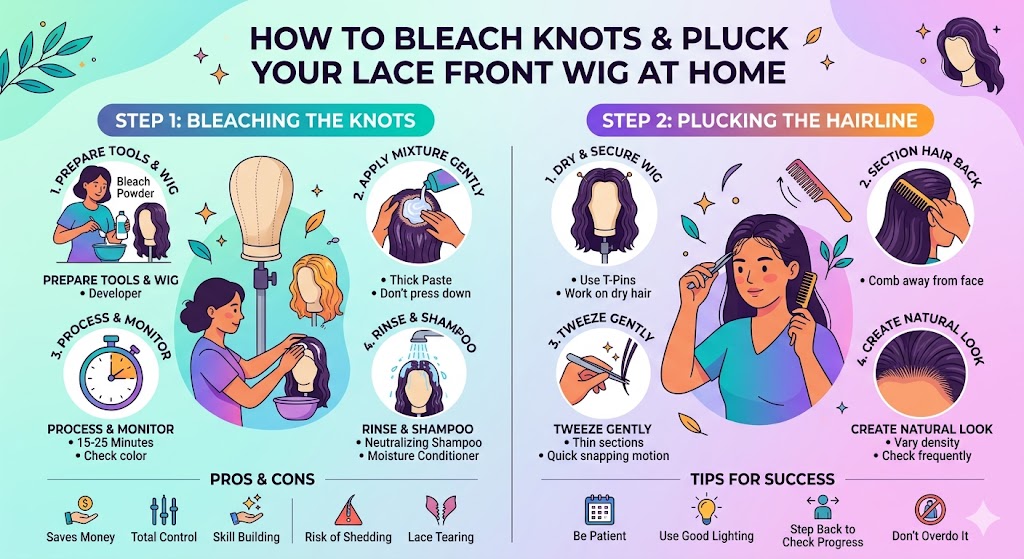
Part 1: How to Bleach the Knots on Your Lace Front Wig
Bleaching the knots turns those obvious dark dots into a warm, flesh-toned colour that blends seamlessly with your scalp.
Gather Your Tools
- Hair bleach powder (e.g., BW2)
- 20-volume or 30-volume developer (stick to 20V if you are a beginner to avoid over-processing)
- Mixing bowl and plastic application brush
- Aluminum foil
- Neutralising shampoo and a moisture-rich conditioner
Step 1: Prepare the Hair
Turn your lace front wig inside out and pin it securely to a foam or canvas mannequin head. Spray any flyaway baby hairs at the base with water or holding spray and comb them backward so they do not accidentally come into contact with the bleach mixture.
Step 2: Mix the Bleach to the Right Consistency
In your mixing bowl, combine one scoop of bleach powder with your developer. The absolute golden rule here is to achieve a thick, cake-batter or cream-cheese consistency. If your mixture is too runny, it will seep through the lace holes and accidentally bleach the roots of the hair, leaving you with unsightly blonde patches on top of your unit.
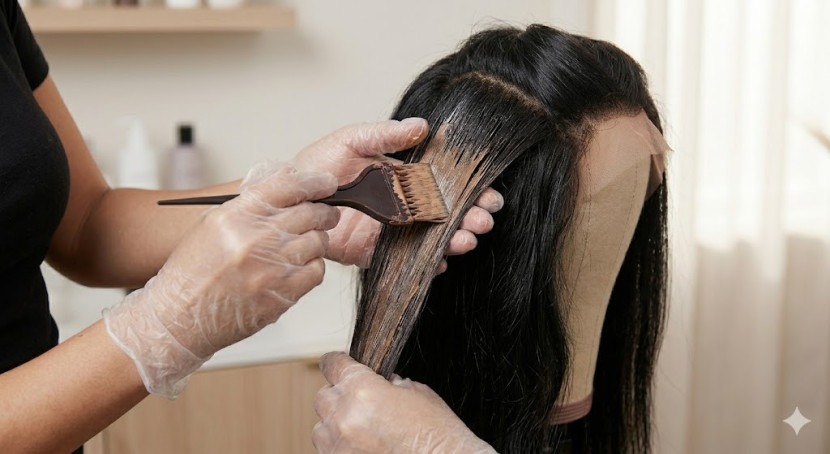
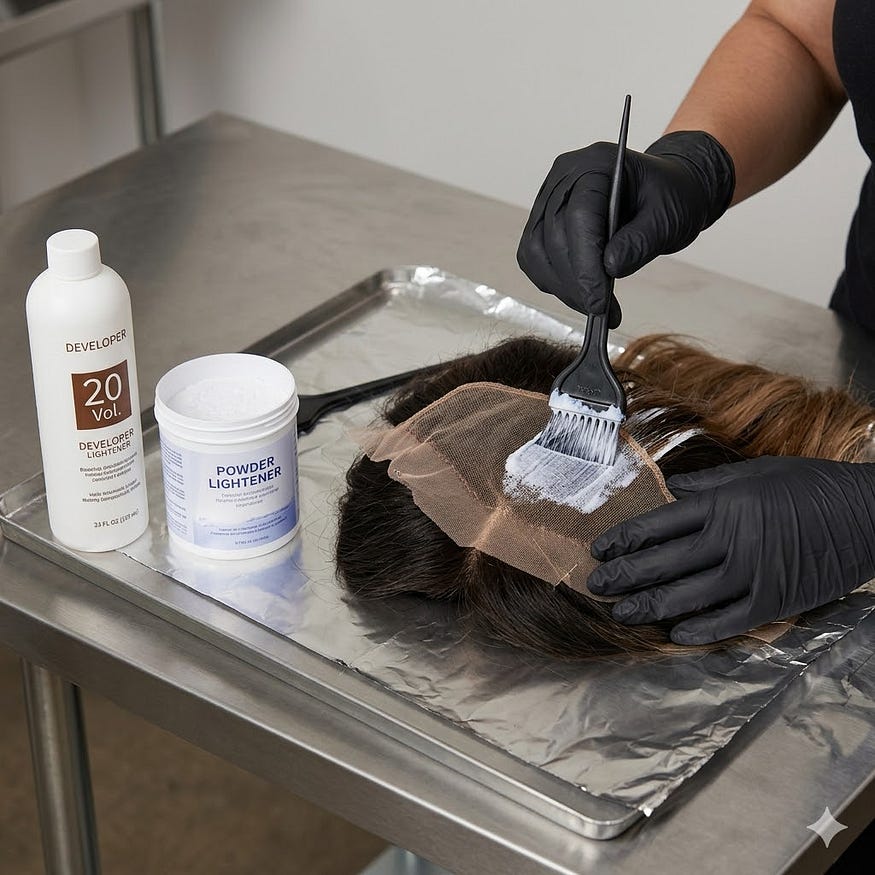
Step 3: Apply with a Gentle Touch
Using your plastic brush, dab the bleach mixture gently onto the lace. Do not press down or force the product into the lace. You want the bleach to sit strictly on top of the knots. Once the entire frontal area is evenly coated, cover it with a sheet of aluminium foil to trap the heat, which helps the bleach process faster.
Step 4: Timing and Rinsing
Monitor the processing closely. This usually takes anywhere from 15 to 25 minutes depending on the room temperature and the hair quality. Once the knots turn a pale yellow or honey-blonde color, take the wig to the sink immediately.
Rinse the lace thoroughly with lukewarm water. Wash the area with a neutralizing shampoo to stop the chemical reaction completely. If the lace looks slightly brassy or orange, you can apply a tiny bit of purple shampoo and let it sit for two minutes before performing a final rinse and applying conditioner.

Part 2: How to Pluck Your Lace Front Wigs for a Natural Hairline
Natural human hairlines are not thick, straight, or dense; they are soft, irregular, and gradually transition from thin hair to thicker hair. Plucking removes excess density from the perimeter of your unit to mirror this natural pattern.
Step-by-Step Plucking Technique
Step 1: Dry and Secure the Unit
While you can pluck hair when it is wet, plucking a dry lace front wig gives you a much more accurate visual of how the density actually looks. Place your dry wig onto a mannequin head and secure it tightly with T-pins.
Step 2: Section the Hair Back
Comb all the hair straight back. Look closely at the factory hairline—it will likely look like a solid, thick wall of hair. To create a realistic gradient, you will need to customise the hairline in thin layers.
Step 3: Start Tweezing the First Layer
Separate a thin layer of hair right at the very front of the hairline and hold it forward. Move your tweezers slightly behind this section into the interior space. Begin tweezing hair strands using a quick, snapping motion.
Pro Tip: Never tweeze repeatedly in the exact same spot, or you will create a bald hole in your lace. Always keep your hand moving in a fluid, side-to-side motion, skipping spaces as you go.
Step 4: Create Parting Sections
To ensure the sides and parting areas look completely natural, part the hair the way you plan to style it (e.g., a middle part or side part). Pluck gently along the edges of that specific part to give it a clean, crisp, realistic appearance.
Step 5: Check Your Progress Frequently
Every few minutes, comb all the hair backwards to step back and evaluate your work. If the transition looks smooth and gradient, you are finished. If certain areas still look dense and bulky, separate another layer and continue plucking with a light hand.
Pros, Cons, & Frequently Asked Questions
Customising your hair at home is an incredibly rewarding process, but it requires patience. Here is a quick breakdown of what to expect, along with answers to common styling questions.
Pros of DIY Customisation
- Cost Efficiency: Saves you significant money compared to paying professional stylist fees.
- Total Control: You can customize the parting, density, and hairline shape to perfectly fit your face.
- Skill Building: Once you master this process, you can easily maintain and refresh old units over time.
Cons of DIY Customization
- Risk of Over-Processing: Leaving bleach on too long can weaken the hair knots, leading to massive shedding later on.
- Lace Tearing: Aggressive plucking with sharp tweezers can accidentally rip holes in the delicate lace base.
FAQs
Can I skip bleaching and just use makeup powder instead? Yes, if you are hesitant to use chemicals, you can use a high-coverage concealer or face powder that matches your skin tone along the parting line. However, bleaching offers a much cleaner, long-lasting look that does not wash out or transfer.
How do I prevent my bleached wig from shedding? Avoid applying heavy oils or conditioners directly to the knots of the lace, as this can loosen them. Additionally, consider spraying the inside of the dry lace with a specialized knot sealer before your final styling.
How long do customized lace front wigs typically last? With proper care, gentle washing, and careful brushing, a high-quality human hair unit can easily last anywhere from six months to over a year.

Conclusion
Customising your lace front wig at home might feel intimidating at first, but taking it slow guarantees beautiful results. By learning how to properly bleach the knots to create a scalp-like illusion and strategically plucking the hairline to remove factory bulk, you elevate your protective styling game to an entirely new level. Just remember to mix your bleach thickly, treat the delicate lace base with care, and step back frequently to check your progress. With a little practice, your units will look completely undetectable, completely natural, and beautifully tailored to you.