Introduction: From Picture to Perfect Stitches
You just got a beautiful new Bernette machine. Maybe it is the b70 DECO or the b79 combo. You unpack it, thread it up, and you are so excited to stitch that cute logo or that floral design sitting on your phone. Then you hit a wall. The machine asks for an embroidery file, but all you have is a JPG. Do not panic. This is the moment every beginner faces, and it is actually easier to solve than you think. When you learn to properly Convert Image to Bernette Embroidery Format, you unlock everything your machine can do. I remember staring at my first blank hoop, wondering why a simple picture would not just sew itself. Turns out, embroidery machines speak a different language. But once you learn the basics, you will be stitching custom designs like a pro in no time. Let me walk you through it, step by step, with zero jargon and plenty of real talk.
Know Your Target: The EXP Format Explained
Before you do anything else, you need to understand what your Bernette actually wants to read. The native language for Bernette machines is the EXP format . Think of EXP as the secret handshake that lets your design and your machine talk to each other.
Here is what makes EXP special. Unlike a simple JPG that just holds pixels, an EXP file contains every single instruction your Bernette needs. It tells the needle exactly where to go, when to stop for a thread change, how dense the stitches should be, and even what color thread to expect . Pretty smart, right?
One important thing to know. When you work with EXP files on a Bernette, you actually need three files that work together. You have the .EXP file itself which holds the stitch data. You have a .BMP file which shows you a little picture preview on your machine screen. And you have an .INF file which stores all the color information . Without the .INF file, your machine might still stitch the design correctly, but the colors on the screen might look a little weird. Do not worry, though. You can still stitch just fine by following your thread chart.
The good news is that your Bernette is not a one-format pony. It can also read other popular formats like DST, PES, HUS, VIP, VP3, JEF, and PEC . That flexibility comes in handy when you download designs from the internet or get files from friends.
Step 1: Start With a Clean Image
The quality of your finished embroidery depends entirely on the quality of the image you start with. Garbage in, garbage out. So grab your JPG and give it a good once-over.
First, choose the highest resolution image you can find. A tiny, blurry thumbnail from a website will stitch out looking just as blurry and sad. If the image looks pixelated on your computer screen, those same jagged edges will show up in your stitches .
Second, clean up the image before you even open your software. Crop out any empty space around your design. Every extra pixel in the file is something your digitizing software has to process, so keep it tight. Remove the background entirely if you want just the main subject. A clean, focused JPG gives your software the clepossible input .
Third, simplify your colors. Your JPG might have thousands of subtle shades, but embroidery thread does not do subtle gradients. Thread comes in solid colors. Posterize the image or use a cutout filter to reduce it to bold blocks of color. Aim for six to twelve colors maximum . Merging similar tones now saves you from having ten different shades of blue that all look identical in the hoop.
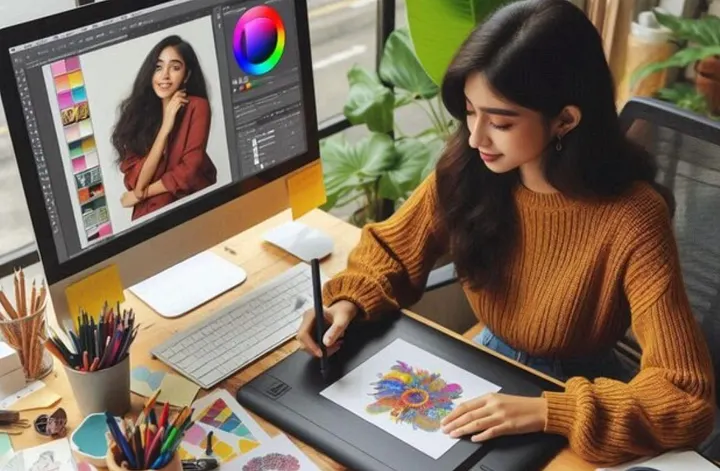
Step 2: Pick Your Software
Unlike changing a document from PDF to Word, you cannot just rename a JPG as an EXP and call it a day. That does not work. You need actual embroidery software that can translate pixels into stitch commands . But here is the good news. You have options at every price point.
Official Bernette Software
Bernette offers its own embroidery software. This is built specifically for Bernette and Bernina machines, so you know the EXP export will work flawlessly. The software gives you extensive text editing, built-in fonts, a design library, and easy drag-and-drop tools to resize and rotate your creations . You can merge and recolor designs on your screen until you are completely satisfied. Best of all, you can download a free 30-day trial from the official Bernette website to see if you like it before buying .
Bernina Creator 9
If you want official software with a bit more polish, look at Creator 9 from Bernina. This is the entry-level version of their professional suite, designed specifically for beginners and hobbyists . It comes with an automatic digitizing wizard that does most of the heavy lifting for you. You just import your image, click a button, and the software creates a basic stitch file. From there you can tweak and adjust. Creator 9 includes over 380 built-in designs and 60 embroidery fonts, so you also get a huge library to play with. It works perfectly with Bernette b70 and b79 machines .
Third-Party Software
You do not have to use official software. Many professionals use Wilcom Hatch, Embird, or the free open-source option Ink/Stitch. All of these can export to EXP format . Ink/Stitch has a steep learning curve but costs nothing. The paid options are more user-friendly and come with better support and tutorials.
For a beginner, I recommend starting with the free trial of the official Bernette software or Creator 9. The interface is designed for people who are new to digitizing, and the learning resources are excellent.
Step 3: The Magic Step – Digitizing
Now we get to the part that feels like magic. You open your software, import your cleaned JPG, and start the process of turning pixels into stitches. This is called digitizing .
If you are using software with an auto-digitizing feature, this is your best friend as a beginner. You simply load the image, click something like Auto-Digitize or Image to Stitches, and the software does its best to trace your design and assign stitch types . It will look at your image, identify the outlines, and guess where satin stitches should go versus fill stitches.
Do not expect perfection on the first try. Auto-digitizing is a starting point, not a finished product. Once the software creates its draft, you need to go into edit mode and clean things up. Here is what to look for.
Check your stitch direction. The angle of your stitches affects how light reflects off the finished embroidery. For letters, satin stitches should run vertically along the stem of the letter. For circles, try to radiate the stitches outward from the center .
Add underlay. Underlay is a hidden base layer of stitches that goes down before your visible top stitches. It stabilizes the fabric, prevents puckering, and gives the top thread a foundation to sit on . Never skip underlay, especially on stretchy fabrics like t-shirts.
Set your density. Density means how close the stitches sit next to each other. For most fabrics, aim for around 0.42 to 0.48 millimeters of spacing . Too loose and you see the fabric underneath. Too dense and your design feels like a stiff plastic patch.
Apply pull compensation. Here is a physics trick. When you stitch dense thread into fabric, the fabric pulls inward slightly. Pull compensation is where you deliberately make your shapes a tiny bit larger in the software. When the fabric pulls inward, it pulls right into the correct size . Without this, circles stitch as ovals and squares look pinched.
Step 4: The Path Matters More Than You Think
One mistake beginners make is ignoring the order in which the machine stitches different elements. The path your needle travels affects everything from stitch time to thread breaks.
In your software, you can reorder the objects in your design. Group same-color sections together so the machine can stitch them in one go. If you have a red outline that touches a red fill, the software should stitch those at the same time rather than jumping back and forth .
Use the stitch simulator if your software has one. Watch how the needle moves. If it looks like it is playing hopscotch across the hoop, rearranging your object order can create a logical flow that reduces jump stitches and shortens run time.
For a beginner, do not stress too much about perfect pathing on your first few designs. The auto settings usually do a decent job. But as you get more comfortable, playing with the stitch order is one of the fastest ways to level up your results.
Step 5: Export and Transfer to Your Machine
Once you are happy with how your design looks on the screen, it is time to export. Save your file as an EXP format . Your software will ask you where to save it. Choose a USB stick.
Here is a crucial tip. When you save an EXP file for a Bernette, make sure you save all three companion files. The EXP file itself, the BMP preview file, and the INF color information file. Copy all three onto your USB stick . If you only copy the EXP file, your machine will still stitch the design, but the preview on the screen might look like a generic icon instead of your actual design.
Insert the USB stick into your Bernette machine. Navigate to the USB menu on the screen. You should see your design appear with its preview image. Select it, and you are ready to hoop and stitch .
Step 6: The Golden Rule – Test First
I cannot say this strongly enough. Never load a brand new design onto expensive fabric without testing first.
Keep a stash of cheap scrap fabric that matches the weight and stretch of your final project. Muslin works great for practice. Hoop it up with the proper stabilizer and run your design .
Watch the test stitch closely. Look for thread breaks, puckering, or gaps between color blocks. Feel the back of the design. Does it feel rough or overly stiff? That probably means your density is too high. Does the fabric ripple around the stitches? That might mean you need more underlay or stronger stabilizer.
Make notes about what you see. Then go back to your software, make adjustments, re-export, and test again. This test-and-tweak loop is what separates frustrating projects from beautiful ones. Even professional digitizers test every single file before sending it to production .
What If You Just Want to Start Stitching?
Look, I get it. Maybe you do not want to become a digitizing expert. Maybe you just want to stitch something cool this weekend and not spend hours learning software. That is totally valid.
You have two options. First, buy ready-made designs. Thousands of websites sell EXP format designs specifically for Bernina and Bernette machines. You download the file, put it on a USB stick, and stitch. No conversion needed.
Second, hire a professional digitizer. For ten to twenty dollars, you can send your JPG to a service that will turn it into a perfect EXP file for you . They handle all the density settings, underlay, and pull compensation. You just stitch. This is a fantastic option for custom logos or one-off projects where you do not want to invest in software.
Conclusion: You Are Ready to Stitch
Converting an image to a Bernette-friendly format might seem intimidating at first, but it really boils down to a few simple steps. Clean up your JPG so it has sharp edges and bold colors. Pick software that works for your budget, whether that is the free trial of Bernette software, Creator 9, or a third-party option. Let the auto-digitizing do the heavy lifting. Tweak your underlay, density, and pull compensation. Export the EXP file along with its BMP and INF companions. And always, always test on scrap fabric before your final project.
The more you practice, the faster and more intuitive this becomes. Before long, you will be turning family photos, custom logos, and hand-drawn doodles into beautiful embroidered designs. Your Bernette is a fantastic machine, and now you know exactly how to feed it the files it craves. Go stitch something awesome.