DIY candle making has exploded in popularity, especially in Australia where cozy evenings call for handmade scents that evoke eucalyptus fields or beach sunsets. Whether you’re crafting gifts or adding ambiance to your home, this simple hobby saves money and sparks creativity.
No fancy equipment needed just basic supplies and a bit of patience. In this guide, we’ll walk through the entire DIY candle making process step by step, from gathering materials to troubleshooting common issues. Ready to light up your craft game?
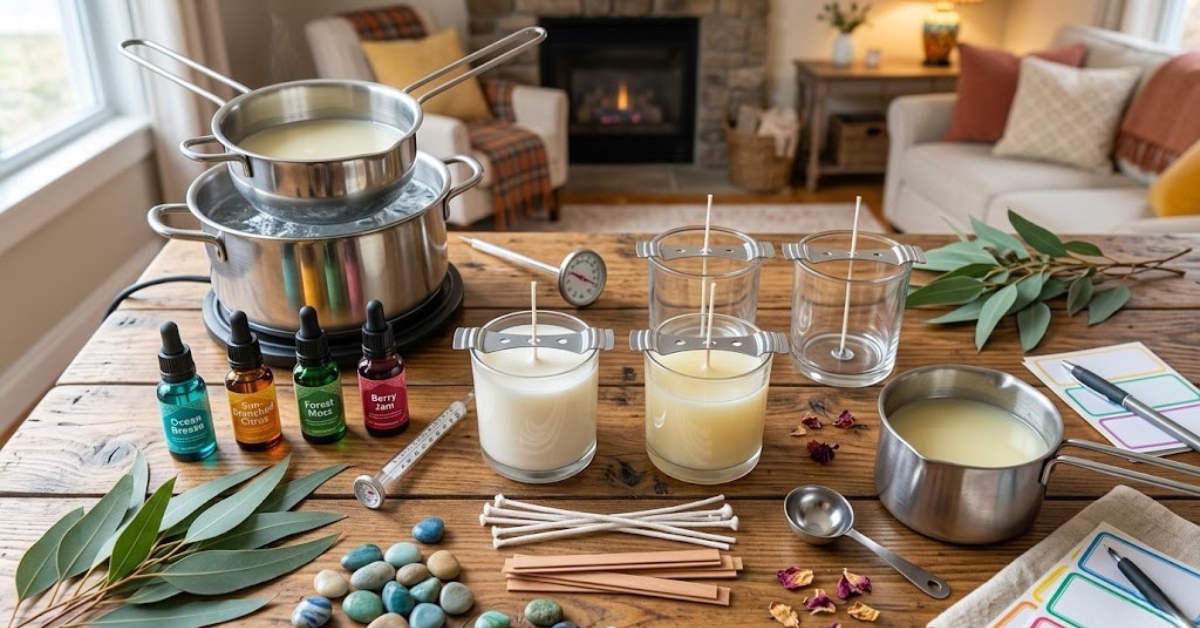
Gather Your Supplies
Start with quality basics to ensure safe, long-burning candles. For Aussies, source beeswax or soy wax from local suppliers soy is eco-friendly and widely available in Melbourne or Sydney craft stores.
Essential items:
- Wax (500g soy or paraffin for beginners)
- Wicks (pre-waxed cotton, sized for your jars)
- Fragrance oils or essential oils (10-20ml per 500g wax)
- Double boiler or microwave-safe container
- Thermometer
- Heat resistant jars or molds (e.g., 200ml glass tumblers)
- Wooden sticks or pencils for wick centering
- Optional: Color blocks or crayons for tinting
Pro tip: For a complete beginner setup, check out ready to use Candle Kits that bundle everything perfectly.
Brands like AMC Supplier offer reliable options tailored for home crafters Down Under.
Prepare Your Workspace
Safety first candles involve heat and fire, so follow Australian standards like AS 1940 for handling flammables. Clear a ventilated area away from kids and pets. Lay down newspaper, grab oven mitts, and have a fire extinguisher nearby. Melted wax cleanup is easier with silicone mats.
Step 1: Prep the Containers
Secure wicks in your jars. Thread the wick through a wick tab (metal base), then glue the tab to the jar’s bottom with hot glue or wick sticker dots. Center the wick by tying it to a pencil laid across the jar’s top. This keeps it straight as the wax sets. Trim excess wick to about 5mm later.
Step 2: Melt the Wax
Weigh your wax aim for enough to fill your jars with 1cm headspace. Use a double boiler: Fill the bottom pot with 5cm water, place wax in the top (or a heat safe bowl over it), and heat on medium. Stir occasionally until it hits 65-80°C (use your thermometer). Microwave alternative: Melt in 30-second bursts, stirring between.
Avoid direct stovetop heat to prevent scorching. Soy wax melts slower but holds fragrance better.
Step 3: Add Color and Scent
Once melted, remove from heat. Stir in color blocks (shave first for even mixing) at 70°C. For scent, add fragrance oil when wax cools to 60°C—this “flash point” locks in the aroma without evaporating it. Stir vigorously for 2 minutes. Popular Aussie scents? Lavender for relaxation or citrus for summer vibes.
Test ratios: 6-10% fragrance by wax weight prevents weak smells or oily tops.
Step 4: Pour the Wax
Cool wax to 55-60°C for soy (hotter for paraffin to reduce cracking). Pour slowly into jars, avoiding bubbles. If air pockets form, poke gently with a skewer. Leave 1cm at the top for even burning.
Step 5: Cure and Trim
Let candles cool undisturbed for 4-24 hours. Soy needs 48 hours to fully cure for max scent throw. Trim wicks to 5mm, then burn test: First burn should melt wax to jar edges (memory ring prevention).
Troubleshooting Tips
- Sinkholes? Top off with more wax at 60°C after partial cooling.
- Frosting on soy? Normal and rustic store in cool, dark spots.
- Weak scent? Use higher quality oils; cure longer.
- Mushrooming wick? Trim shorter or switch wick size.
Experiment safely—Australia’s variable humidity affects curing, so note your batches.
Why DIY Candle Making Rocks
Beyond savings (under $5 per candle), it’s therapeutic and customizable. Sell at markets or gift during holidays. Scale up with molds for pillars or embeds for luxe layers.
There you have it the full DIY candle making process from melt to mantle. Grab supplies, ignite your creativity, and fill your home with handmade glow. What’s your first scent choice?